Showing posts with label N6QW. Show all posts

Wednesday, June 3, 2015

Diode Ring Mixer - UPDATED

In an attempt to firstly melt more solder than I have of late, and secondly to try and actually understand the operation of a mixer, I have decided to build one up from discrete components, including (gasp) winding my own transformers.

The rather rough diagramme of the circuit I propose to build looks something like this which is based on the fine design by Pete Juliano N6QW found here:


I found a few 1N6263 Schottky diodes in my junk box and out of the lot was able to find four that matched on the forward voltage drop to the millivolt level at 0V300.  A quick look around found a bit of PCB and a 1/4 inch sheet metal hole punch allowed me to create simple Manhattan pads.  Here is the layout at the start of the build with just the diodes installed.


I wound coils on FT37-43 cores.  I seem to be out of enameled wire, so I am going to try this with 30 gauge insulated wire-wrap wire as the number of turns is small, though the coils are trifilar.  I wound the trfilar wires together using a drill motor and then wound the three wires onto the core.  Ten turns, both coils are identical.


Separating the coil winding ends, I check continuity on them and mark them with a Sharpie (why is a dull felt pen called a Sharpie?) on each end of the wire with no mark, a single mark or a double mark.  The no mark wire will be the single coil while the one and two mark wires will be hooked in series (observing phasing).  The left side as drawn in the circuit above, will have a 100 ohm variable resistor at the centre tap of the transformer secondary to allow small balance adjustments.  As suggested by Pete Juliano N6QW, but not drawn above, I plan to also include a 39 ohm resistor that is switchable to ground from the centre tap in order to intentionally unbalance the mixer.  This is useful for injecting carrier for tune-up purposes for example.

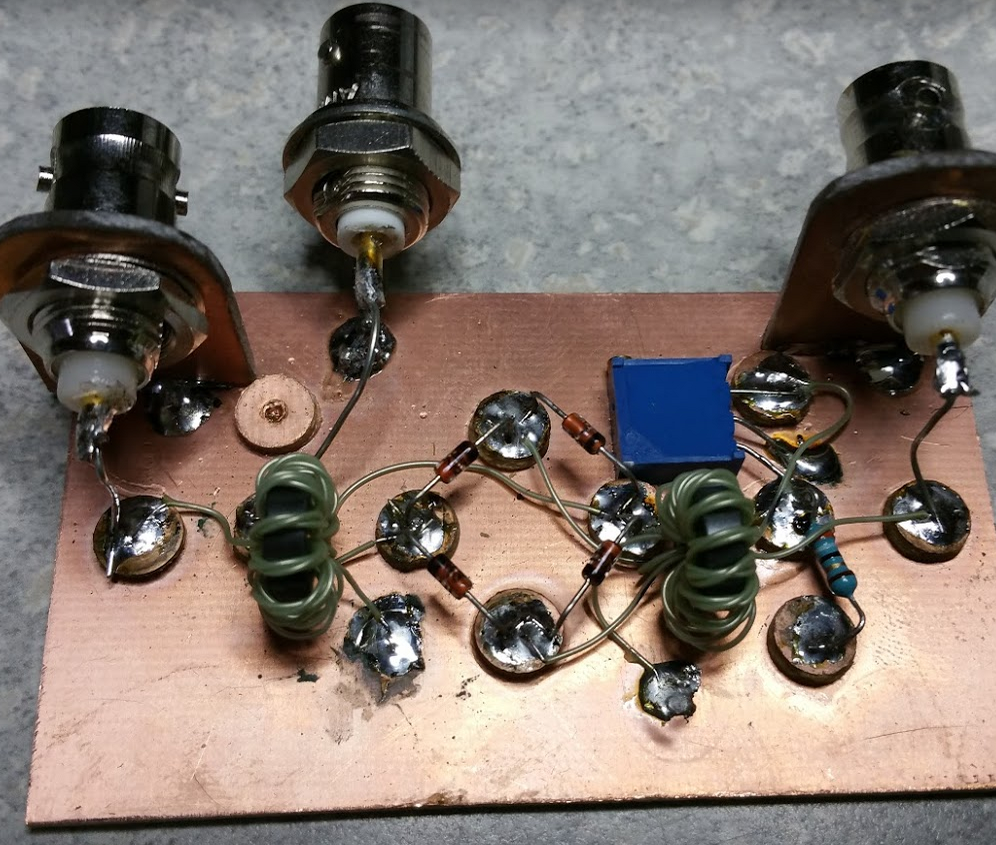
The final build, minus the output filter can be seen below.  I hope to get out of interview preparation mode soon so that I can have some time to check this out.  The trim pot is a 100 ohm multi-turn pot to allow fine tuning of the balance.  Connecting the top of the 39 ohm resistor to ground will deliberately unbalance the mixer.


Finally got a chance to see if this little guy is mixing or not.  I set the 100 ohm multi-turn pot to the middle and attached the output of a 20 MHz crystal oscillator to it along with a signal generator output and had a look at the output on the spectrum analyzer.  Firstly, we needed some connectors.

I gave it 20 MHz on one port, 1 MHz on the other, both at 7 dBm and obtained the following output.  Both the sum and difference were within 0.08 dBm of each other.
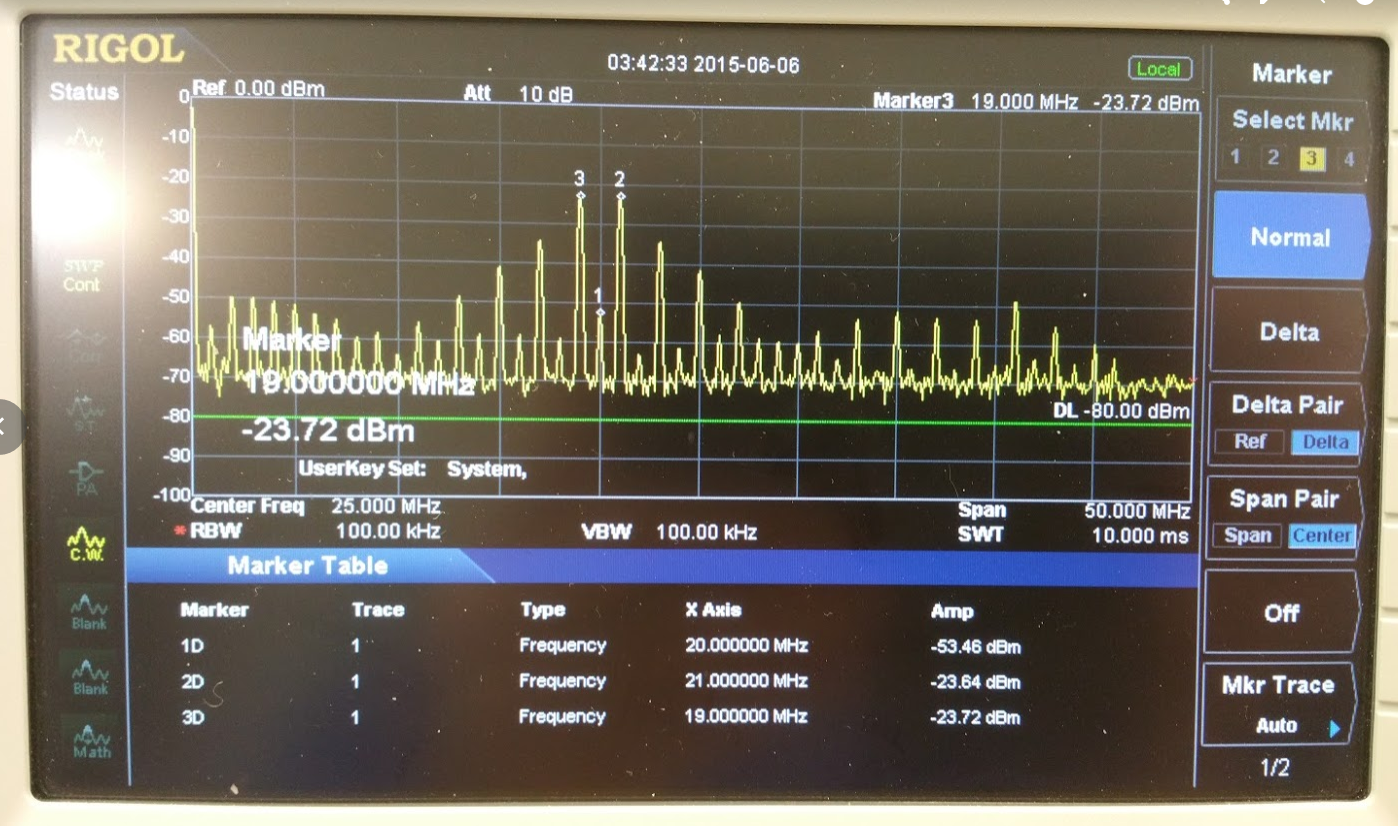

So, we seem to be mixing and with proper IF filtering following, should be good to go.  Many thanks to Wayne NB6M for helping with the testing.


Monday, May 11, 2015

Si5351 clock generator

I am having a play around with a the much discussed Adafruit Si5351 clock generator board this morning while waiting for a phone interview.  It is a nice bit of kit and will be handy for a number of frequency generation needs.  The device comes on a small break-out board.  The only soldering required is to hook up the 0.1" header pins if desired for breadboard work and to mount three SMA connectors on the edge if desired.  There are three clock outputs brought out to the SMA connectors, but also to three header pins.


The device is an i2c device addressed at 0x60 so only power, ground and two i2c wires are necessary to get it oscillating.  Since so much has been written on this module previously, I won't bore you with recreating all of that here.  I decided to use (N6QW) Pete Juliano's "Let's Build Something" project as the starting point.  You can see Pete's project pages over at http://www.jessystems.com/.  Pete also has a great series of videos on his youtube channel here. 

For my lash-up, I am using a ATMega2560 board, Version 1.6.3 of the Arduino IDE, an old 20x4 LCD display that I have put an i2c backpack on, and the Si5351 from Adafruit.

The device is a 3V3 device, but the board sports a nice LDO voltage regulator to allow powering from a 5V rail.


Pete has the unit set up to cover the 40 metre band for a homebrew SSB rig.  The IF frequency appears to be 4.9136 MHz, for a display frequency of 7.1 Mhz, the oscillator is being set to 12.0136 MHz.  The signal looks pretty good, right off of the output pin.


I removed the IF offset from the oscillator frequency setting to output the displayed frequency.  At 7.1 MHz, the signal is somewhat less sinusoidal.  At low frequencies the device outputs a square wave with a bit of overshoot.  As you go up in frequency, the waveform below is prevalent which is really still the same thing, though the rise and fall time as a function of frequency is longer.  The waveform above is nearly sinusoidal at 12 MHz though above about 25 Mhz, the overshoot returns.


The output voltage at 1 MHz is about 3V3.  At 30 MHz, the peak-to-peak drops to about 0V5 with about a 2V positive DC offset.  Above 32 MHz the voltage level begins to rise again.  There are several of these peaks and valleys in amplitude as you continue to go up in frequency.  Above 35 MHz, the waveform appears to be mostly triangular.

As time allows, I plan to experiment more with this little device in my projects, but just wanted to have a quick experiment to get the device up and running.